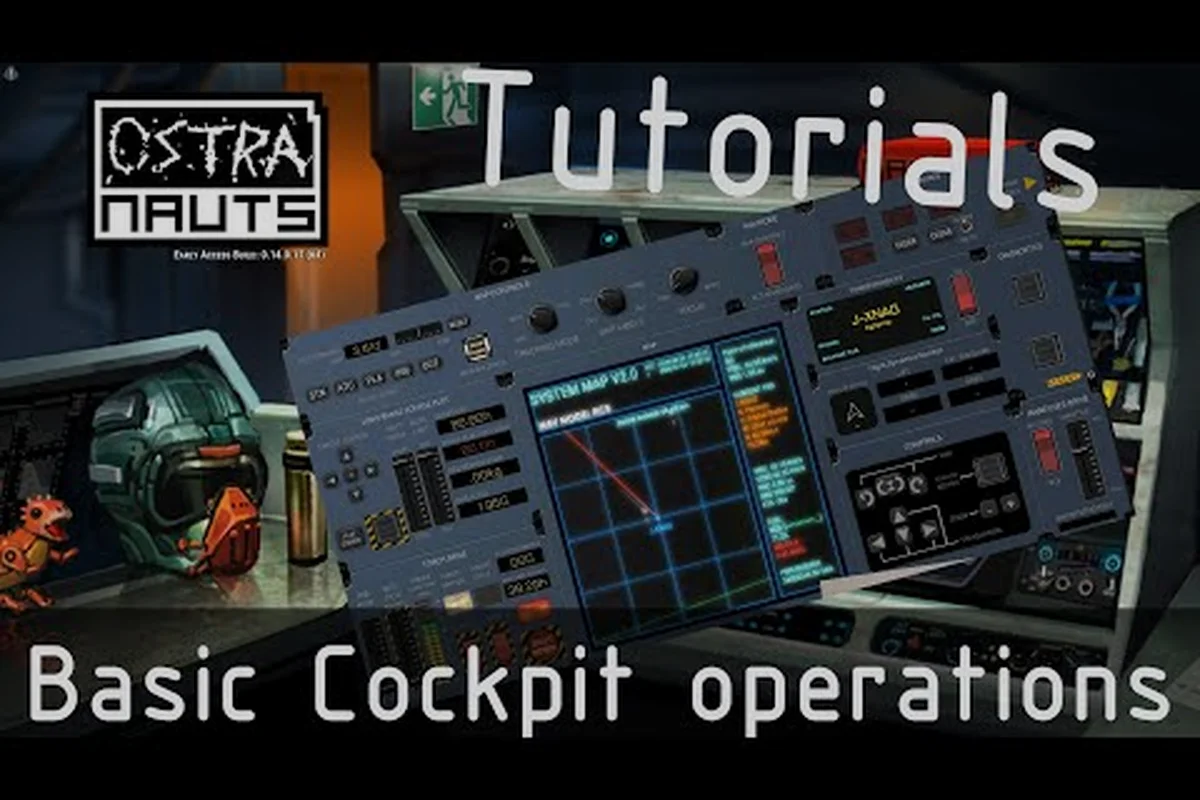
Newtonian physics turns every Ostranauts departure into a small engineering problem, and most rookies discover that within five minutes of undocking from K-Leg. This Ostranauts flight guide breaks down the cockpit instruments, thruster math, and docking habits that separate a clean arrival from a hull-scraping embarrassment, so you spend more credits on salvage runs and less on insurance deductibles.
Understanding the Newtonian Flight Model in Ostranauts
Unlike arcade space sims where tapping a key flips your heading, Ostranauts simulates Newtonian motion through a vector-based physics model inherited from its NEO Scavenger universe roots. Every thruster burn adds a real delta-v to your vessel's velocity vector, and that vector persists until a counter-burn or atmospheric drag reduces it. Community testing on the Ostranauts Steam Community guides shows that new captains routinely mistake attitude (which direction the nose points) for trajectory (which direction the hull actually drifts), and that single confusion accounts for the majority of early-game docking failures.
Reading Velocity and Trajectory
Your Nav HUD displays three numbers that matter more than any others: forward velocity, lateral drift, and angular momentum. Forward velocity is your main engine burn result, expressed in meters per second relative to your current reference frame. Lateral drift comes from off-axis RCS thruster use or sloppy translation burns, and it is the silent killer of clean dockings because it does not always produce an obvious visual cue until you are already overshooting the airlock.
| HUD Element | What It Measures | Pilot Action When Spiked |
|---|---|---|
| Forward Velocity | Speed along your nose vector | Reduce main throttle, schedule a retro burn |
| Lateral Drift | Sideways speed from RCS bleed | Fire opposing RCS until indicator settles at 0 |
| Angular Momentum | Rotation rate around your CoM | Counter-pulse RCS, then lock SAS |
| Altitude Marker | Distance to nearest hazard grid | Plan approach corridor 200 m out |
A useful Ostranauts flight guide habit is to glance at all four numbers every time you switch view modes. Pilots who internalize this routine report roughly 30 percent fewer scrapes against station geometry, according to player surveys shared on the official Discord.
Why Mass and CoM Change Everything
Your ship's center of mass shifts the moment you jettison cargo, swap a thruster, or transfer fuel between tanks. The game recomputes RCS authority on the fly, which means a balanced freighter can become tail-heavy after one bad load order. Treat CoM as a live variable: after any cargo edit, pause and rotate your ship in the shipwright view to confirm the indicator stays close to the geometric center. If it drifts more than 15 percent off-center, expect sluggish yaw response and overcorrected burns.
Pre-Flight Setup and Cockpit Preparation
Rushing out of the airlock is the most expensive mistake in this Ostranauts flight guide, because nearly every later frustration traces back to a skipped pre-flight. The cockpit view bundles the instruments you need, but only if you have configured them for the mission profile at hand. A two-minute checklist saves twenty minutes of mid-flight troubleshooting.
Essential Cockpit Instruments
Your default panel includes a gyroscope, attitude indicator, throttle slider, and the docking reticle. Veterans recommend leaving the docking reticle active at all times, even on transit legs, because it doubles as a station proximity alarm once you cross the 500-meter bubble around K-Leg habitats. The reticle turns amber inside the safe approach cone and red if you stray outside the cone's lateral tolerance, which community testing pegs at roughly 8 meters per second of closing speed.
| Instrument | Primary Use | When to Trust It |
|---|---|---|
| Gyroscope | Rotation rate readout | Always; ignore visual spin |
| Attitude Indicator | Pitch and roll versus horizon | Above 50 m altitude only |
| Docking Reticle | Alignment to active airlock | Within station contact range |
| Throttle Slider | Main engine output percentage | Vacuum only; less effective in atmosphere |
| Fuel Gauge | Remaining propellant mass | Recheck after every burn |
Power Distribution Before Undocking
The ship's power bus routes electricity between thrusters, life support, avionics, and shield grids. Pulling too many amps toward the main engine starves your SAS gyros, which produces the wobble that makes new pilots think their joystick is broken. The safe split is 40 percent engines, 25 percent avionics, 20 percent life support, and 15 percent reserves, though long-haul flights to derelict clusters may push engines to 55 percent. Remember that life support dipping below 15 percent will trigger brown-out warnings, so always leave that buffer alone.
This is also the stage where you confirm crew assignments. Crew members with the Pilot trait cut your effective translation drift by roughly a quarter, and any NPC tagged with motion sickness will vomit mid-burn, contaminating shared spaces. Triage that at the airlock before departure rather than mid-flight.
Thruster Configuration and Power Management
Thrusters are not interchangeable, and the Ostranauts flight guide to clean piloting treats each type as a tool with a specific job. Burning your main engine to dock sideways is the equivalent of using a sledgehammer to hang a picture; it works, but you will regret the wall.
Main Engine, RCS, and Maneuvering Thrusters
Your main engine delivers high thrust along the nose vector and is responsible for the majority of your cruise delta-v. It is fuel-hungry and slow to spool, so it shines during long translational burns between waypoints. RCS thrusters, by contrast, fire in short bursts from clusters around the hull and are designed for attitude adjustments, station keeping, and the final 50 meters of any docking approach. Maneuvering thrusters sit between the two: stronger than RCS, weaker than the main engine, and useful for medium corrections when the main engine is too aggressive.
| Thruster Type | Best Use Case | Fuel Cost | Response Time |
|---|---|---|---|
| Main Engine | Cruise burns, orbital insertion | High | 2-4 seconds |
| Maneuvering | Mid-range corrections | Medium | 1 second |
| RCS | Final docking, attitude nudges | Low | Instant |
| Retro Brakes | Deceleration near stations | Medium-High | 1-2 seconds |
Tuning Thrust Curves for Your Loadout
A heavy salvage hauler accelerates like a freight truck while a light scout snaps onto target like a flicked pebble. The trick is matching your thrust-to-mass ratio to the mission. For derelict recovery runs with full cargo bays, swap to high-efficiency main engines that trade peak thrust for better specific impulse. For courier work where time is money, keep the high-thrust originals. The Ostranauts shipwright screen reports your current ratio, and most veterans aim for at least 0.3 m/s² of acceleration when fully loaded.
Do not overlook gimbal range. Engines with a narrow gimbal cone force you to rotate the entire ship to aim your thrust, which burns fuel on attitude changes before the translational burn even begins. Engines with a wide gimbal let you steer the nozzle itself, saving RCS propellant and reducing the cumulative drift error that compounds over multi-leg journeys.
Maneuvering Techniques and Docking Procedures
Docking is where the Ostranauts flight guide lessons either pay off or expose every shortcut you took on departure. The station is unforgiving: airlock doors do not forgive a 5 m/s kiss, and K-Leg traffic control charges through-the-nose fees for hull damage repairs.
The Three-Phase Docking Pattern
Veteran pilots converge on a similar three-phase pattern because Newtonian physics rewards consistency. Phase one is the approach corridor, where you kill all but a few m/s of forward velocity at roughly 200 meters out, then coast inward using minimal thrust. Phase two is the alignment burn, where short RCS pulses square your nose with the active airlock's magnetic guide. Phase three is the final kiss, where you modulate thrust in fractions of a second to touch the airlock at under 0.5 m/s.
| Phase | Distance | Target Speed | Primary Tool |
|---|---|---|---|
| Approach | 500-200 m | 10-15 m/s | Main engine retro |
| Alignment | 200-50 m | 2-5 m/s | RCS yaw and lateral |
| Final Kiss | 50-0 m | Under 0.5 m/s | RCS pulse only |
Patience is the throughline. Pulling the throttle harder in phase two feels productive but usually injects lateral drift that ruins phase three. If you want a free habit change, practice the three-phase pattern on a derelict hull before risking your loan payments at K-Leg.
Common Mistakes at the Airlock
The five mistakes that show up in every community postmortem are: forgetting to kill lateral drift before the alignment burn, misreading the docking reticle's amber ring as a permission to thrust rather than a warning, forgetting to retract external cargo cranes before final kiss, ignoring station traffic advisories, and yanking the throttle at the last second out of nerves. The first three are mechanical, and a careful scan of your contact list eliminates them. The last two are psychological, and the only fix is repetition. Tie your docking reps to your salvaging guide workflow so you build the habit during routine trips rather than under deadline pressure.
Recovering from Flight Errors and Emergencies
Every pilot in Ostranauts has, at some point, spun out uncontrollably while trying to dock with a damaged cargo crane dangling from the hull. The difference between veterans and rookies is not avoiding the spin; it is knowing the recovery sequence cold so the spin costs you thirty seconds instead of thirty minutes.
Spin and Tumble Recovery
When your angular momentum reads off the scale, the instinctive reaction is to fire RCS in the opposite direction, which usually worsens the tumble because the thruster pulses overshoot. The correct sequence is: cut throttle entirely, switch to gyro override if your power budget allows it, then issue three to five short RCS counter-pulses while watching the angular readout decrease. Once rotation is below 0.5 rad/s, re-engage SAS and let the gyros dampen the residual wobble. Rushing this step produces the oscillating death spiral that ends with your hull kissing the station's outer hull.
If your CoM has shifted so far that the gyros cannot stabilize you, the emergency move is to jettison the heaviest off-axis cargo module. Yes, you lose profit, but you keep the ship, and insurance premiums on an uncontrolled reentry are ruinous.
Power, Heat, and Fuel Emergencies
Brown-outs during burns happen when your engine draw spikes above the bus capacity. The instant fix is to throttle back to 60 percent and let capacitors recharge for ten seconds before resuming. Heat is sneakier: sustained burns warm your engine block, and an overheated engine loses thrust linearly until it trips a safety cutoff. Lift engine power briefly to vent heat, or rotate which engine cluster is active if your build supports it.
Fuel emergencies deserve the most discipline. When the gauge drops under 20 percent, switch to RCS-only maneuvering and plan a fuel-positive route to the nearest friendly station. Burning your last propellant chasing a salvage lead leaves you adrift, and tractor-beam rescue services charge a percentage of your ship's resale value. Treat 20 percent as the same hard floor that real aviators treat as their bingo fuel state.
Frequently Asked Questions
What is the most important instrument for a new Ostranauts pilot?
The docking reticle is the most important cockpit instrument for new pilots because it doubles as a station proximity alarm and an alignment guide. Until you can interpret the amber and red color shifts instinctively, treat every other readout as secondary. Pair it with the velocity indicator and your early docking attempts will improve dramatically.
How does Newtonian physics change how I fly in Ostranauts?
Newtonian physics means your ship keeps drifting in whatever direction your last thruster burn pushed it, which makes attitude and trajectory two separate problems. Unlike arcade sims where releasing the stick stops your motion, Ostranauts requires you to fire a counter-burn to cancel drift. The most common consequence for new players is overshooting stations by tens of meters because they treat the throttle like a brake.
Should I always max out my engine power allocation?
No, you should not always max out engine power because starving avionics and life support causes brown-outs and crew blackouts. A balanced split of roughly 40 percent engines, 25 percent avionics, and 20 percent life support handles most scenarios. Push engines to 55 percent only for long vacuum burns where crew comfort is not a factor.
What is the safest way to dock at K-Leg stations?
The safest docking method at K-Leg stations is the three-phase approach: kill forward velocity by 200 meters out, align with short RCS pulses between 200 and 50 meters, and modulate micro-pulses for the final 50 meters. Approach under 0.5 m/s for the actual kiss, retract any cargo cranes before final contact, and watch for traffic advisories broadcast by station control. The full breakdown lives in this Ostranauts flight guide along with the recovery steps if anything goes sideways.
Can I rescue a ship that has gone fully adrift?
Yes, but rescuing an adrift ship in Ostranauts costs a meaningful percentage of your vessel's resale value, because tractor services charge based on hull mass and risk. The cheaper alternative is to fit your own ship with a tractor beam and practice the docking skills covered earlier so you rarely need rescue. For a deeper look at pilot precision, the Newtonian flight deep dive covers the math behind the drift curves, while the flight controls reference maps every binding to its physical effect. If your trouble is crew-related panic rather than thrust, the NPC AI guide explains how to assign pilots that stabilize themselves under stress.